Guides
How to Set Up a Wheel-On Turbo Trainer (Step by Step)
The short answer
- Swap your road quick-release for the trainer's own skewer every time: it has the solid end caps the dropout slots need.
- Run a turbo tyre at 100 to 110 psi: too soft slips, too hard wears fast and feels harsh.
- Set roller tension by my rule: wind the adjuster in until it just touches the tyre, then three full turns more.
- Add a riser block under the front wheel so the bike sits level and your weight is not dumped onto your hands.
- Smart trainers need a spindown calibration after a 10-minute warm-up, redone after any tyre or bike change.
Setting up a wheel-on turbo trainer takes around 15 minutes the first time and under five once you have done it twice. The order that matters is: swap to the trainer’s own skewer, set tyre pressure to 100 to 110 psi, clamp the bike into level legs, wind the roller in to contact then three full turns more, add a front riser block, and run a spindown calibration if it is a smart trainer. Get those five things right and the trainer will hold power cleanly without slip.
I have set up dozens of wheel-on trainers for first-time indoor riders, and the same handful of mistakes come up every time: the wrong skewer, soft tyres and a roller wound too far. Get the order below right and the trainer will hold power cleanly without slip.
What you need before you start
- The trainer and its supplied skewer (do not lose it)
- A track pump with a gauge
- A riser block, or a folded mat or block of timber the same height
- A mat or old towel for the floor
- A turbo-specific tyre if you train through winter (more on that below)
Step by step: setting up a wheel-on trainer
- Swap the quick-release skewer. Take out your road skewer and fit the one that came with the trainer. It has a longer axle and solid end caps designed to seat in the dropout slots. A road skewer can sit unevenly and, worse, pull through the slot under load. This is 30 seconds of work and I do it every single time.
- Set tyre pressure to 100 to 110 psi. Pump the rear tyre to the middle of that band on a road tyre. Below 80 psi the tyre squashes against the roller and slips; above 120 psi the ride turns harsh and the tyre wears quicker. Drop a wheel-on trainer to around 75 psi and the power reads noticeably low under load purely from slip, so this step is not cosmetic.
- Place the trainer on level ground and open the legs. Spread the rear legs until they lock out fully. A slight floor slope makes the bike pull to one side and you will fight micro-corrections all session. Carpet is workable with a firm mat; concrete is best.
- Clamp the bike in. Drop the rear axle into the dropout slots and lock the retention mechanism, usually a thumb-nut each side. Tug the bike forwards and back: it should not shift at all.
- Set the roller tension. Wind the roller adjuster in until it just touches the tyre, so you feel the resistance change by hand. From that contact point, give it three full turns more. That is the rule I give every rider: contact, then three turns.
- Add a riser block under the front wheel. The rear axle now sits 4 to 6 cm higher than normal, so without a riser the bike tips forward onto your hands. Level it with a block, a folded mat or a piece of timber.
- Calibrate (smart trainers only). Warm up steadily for 10 minutes, then run the spindown in your app. Skip this on a basic magnetic trainer: there is nothing to calibrate.
How tight should the roller be?
This is the question I get more than any other, so here is the reference in a table. The “contact plus three turns” rule is the default; adjust within the range only if you still see slip after confirming tyre pressure.
| Tension setting | Turns from contact | What happens | Verdict |
|---|---|---|---|
| Too loose | 0 to 1 | Tyre slips on the roller, power reads low, calibration drifts | Avoid |
| Default (my rule) | 3 | Clean power transfer, accurate spindown, normal tyre wear | Set here first |
| Firm | 3.5 to 4 | Slightly heavier feel, faster tyre wear, occasional benefit on steep ERG ramps | Only if still slipping |
| Over-tight | 5+ | Tyre wears in weeks, artificially heavy resistance, more vibration | Avoid |
If you are fighting persistent slip even after this, work through my guide on how to fix turbo trainer slipping issues before you touch anything else.
Tyre pressure and why it matters for accuracy
Tyre pressure is the single biggest variable on a wheel-on trainer after roller tension. A correctly inflated turbo tyre at 100 to 110 psi gives a consistent contact patch, which is what the spindown calibration is built around. Inflate or deflate after calibration and your power model is now wrong.
With pressure held around 105 psi and the roller at three turns, a smart wheel-on like the KICKR Snap holds power close to its claimed accuracy across the range. Drop the pressure and that gap widens fast. Check pressure before every ride: a tyre in a cold garage can lose 5 to 10 psi overnight.
Calibrating a smart wheel-on trainer (spindown)
Smart trainers need a spindown calibration before the first ride and after any tyre or bike change. The routine is the same across most brands:
- Ride steadily for 10 minutes to bring the tyre up to temperature. A cold tyre reads differently to a warm one.
- Open the calibration option in your trainer’s app (Wahoo Fitness, Tacx, or a third-party app like Zwift or TrainerRoad) and follow the on-screen steps.
- The app measures how long the wheel takes to decelerate from a set speed and adjusts the resistance model.
Three things govern calibration accuracy: tyre pressure, roller tension and tyre temperature. Always calibrate after the warm-up at your normal pressure, and recalibrate whenever you swap bikes, fit a new tyre, or see power reading inconsistently. On the Snap, inconsistent resistance during intervals is almost always tension or calibration, not a fault, so check those before contacting support. If you are unsure how to read the numbers afterwards, I cover that in understanding power readings on your turbo trainer.
Common setup mistakes
- Skipping the riser block. Twenty minutes in, your wrists and shoulders will tell you. Level the bike.
- Calibrating cold. Always warm up 10 minutes first.
- Chasing slip with tension instead of pressure. Pressure is the cause nine times out of ten.
- Leaving sweat on the frame. Drape a towel from stem to seat tube. Sweat is acidic and corrodes frames and headset bearings.
- No fan. Core temperature climbs faster indoors and your power fades within 20 to 30 minutes without airflow.
If your finished setup is buzzing or rattling, that is usually tension or a tyre seated unevenly on the rim, and I work through the causes in common causes of turbo trainer vibration.
Which trainer is easiest to set up?
If you are buying with simple setup in mind, a basic magnetic trainer like the BDBikes magnetic trainer is the quickest: no Bluetooth, no app, no calibration. Set the roller and ride, assembled from the box in under five minutes. If you want app integration and ERG, the Wahoo KICKR Snap takes a few more steps but its in-app spindown is clearly guided.
Deciding between a wheel-on unit and going direct drive is a separate question worth getting right before you buy: I compare them in direct drive versus wheel-on turbo trainers, and you can see the full ranked list in my best turbo trainers guide.
BDBikes
BDBikes Magnetic Trainer
Best for First-time indoor riders
No Bluetooth, no calibration, no app. Set the roller tension, clip in and ride. Assembles from the box in under five minutes.
Wahoo
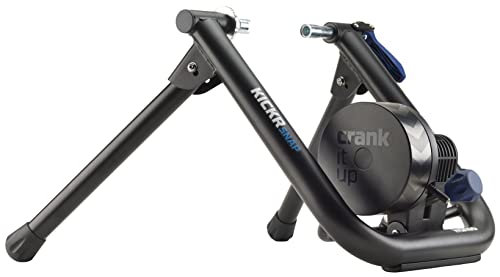
Wahoo KICKR Snap
Best for Zwift and TrainerRoad on a budget
More steps than a basic trainer but well documented in the Wahoo app. The in-app spindown takes 10 minutes on first use and holds power close to its claimed accuracy once calibrated warm.
Setup checklist before your first ride
A wheel-on trainer is genuinely simple once the order is in your head: skewer, pressure, level legs, roller to contact plus three turns, riser block, then a warm spindown if it is smart. Nail tyre pressure at 100 to 110 psi and roller tension at three turns and the large majority of slip and accuracy complaints disappear. Build a permanent corner with the trainer assembled and a fan ready, and you will actually use it on the busy evenings when it counts.